Introduction
There are some videos that show the “Gameboy Micro” working without soldering. However, these videos do not show you clear screenshots of what it should look like or the positioning, just the end result with tape on top. Here are the example videos:
Why?
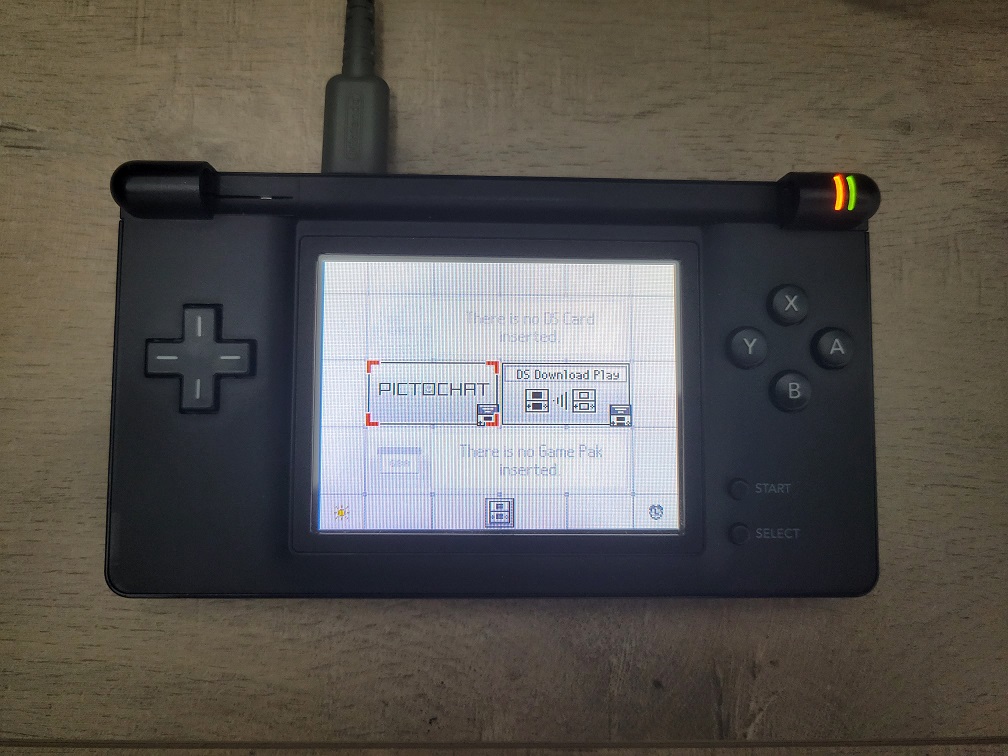
Converting a DS Lite into a “Gameboy Macro” is a way to save the device after the top screen stops functioning. When the top screen is not detected, the bottom doesn’t load, just a quick white flash, and the device turns off. The proper way to fix this is to solder a 330 Ohm resistor (surface mount) to contact points labelled LEDA2 and LEDC2. This will allow you to use just the bottom half of the DS Lite as a Gameboy Advance (GBA) without producing more electronic waste. This hack is a last-ditch-effort to save a DS Lite device WITHOUT using a solder, and without buying anything outside of regular household items.
Instructions
-
Open up the DS Lite and remove the top half. There are plenty of tutorials on how to do this, so we’ll skip right to the important part.
-
Take the rubber pad for the buttons and slice off one of the black contacts (not from the D-Pad!). Reminder, that the Gameboy Advance only had the
D-PAD,START,SELECT,L+Rtriggers, andA+Bbuttons. We’re essentially removing contact with one of the useless buttonsX/Yto make this work. In other tutorials, this pad is cut up with scissors. Using an X-Acto knife (or similar) works.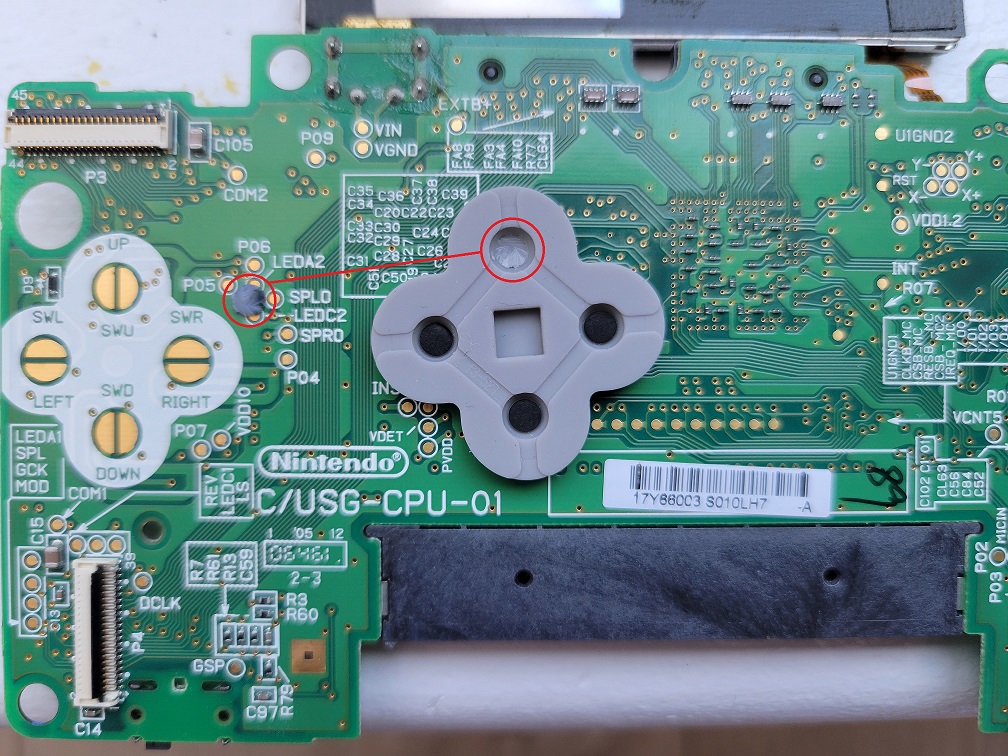
-
Place the black side of the contact faced down on the contact points labelled
LEDA2andLEDC2. Once in place, put some tape on it. Kapton tape works great here. If you don’t have this handy, open up the top half of the DS Lite and use the yellow tape there. It should still be nice and sticky if it hasn’t been removed before.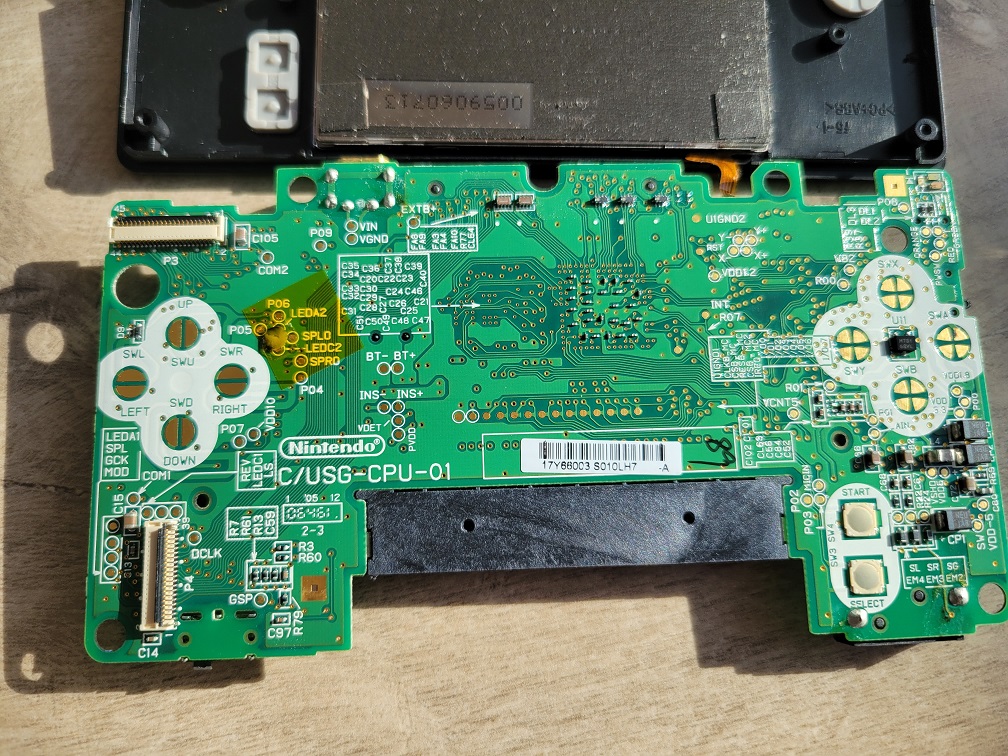
-
Place the bottom screen back in place and make sure to push in the ribbon cable all the way. This is a good time to put in the battery to test if it turns on. If you just get a white sceen, re-seat the ribbon cable and try again.

-
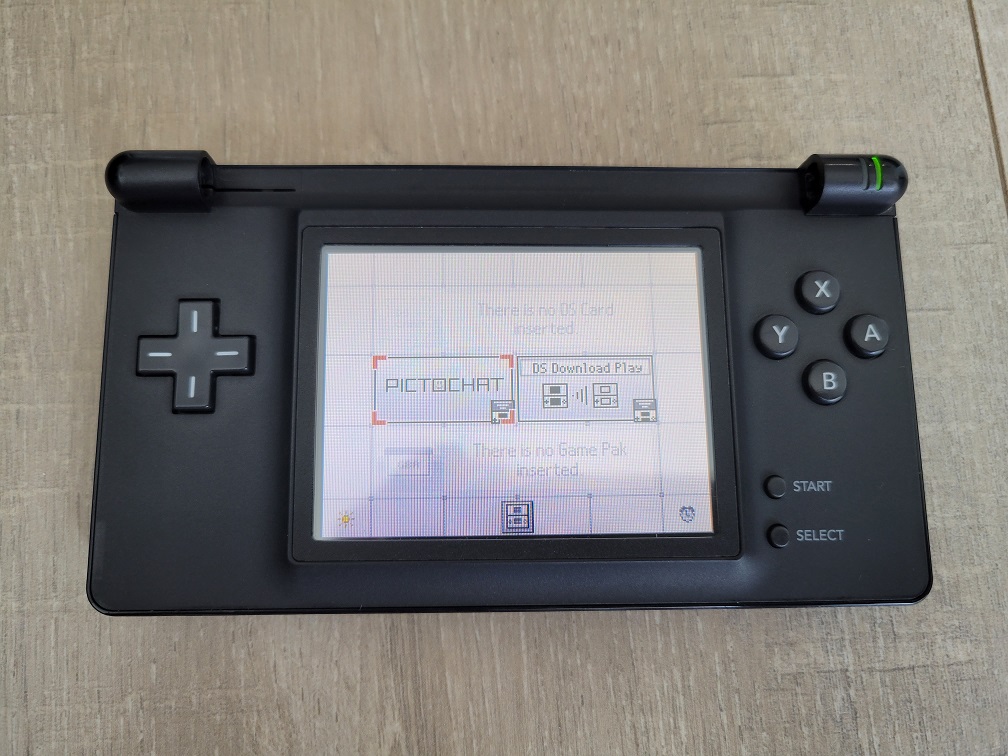
Once everything is working, put the shell back together and try again.
Remarks
Be extra careful when removing the wifi wires. If you remove them too fast, it might hit the EM10 filter and crack it. While this still allows the device to function, you lose charging capability.
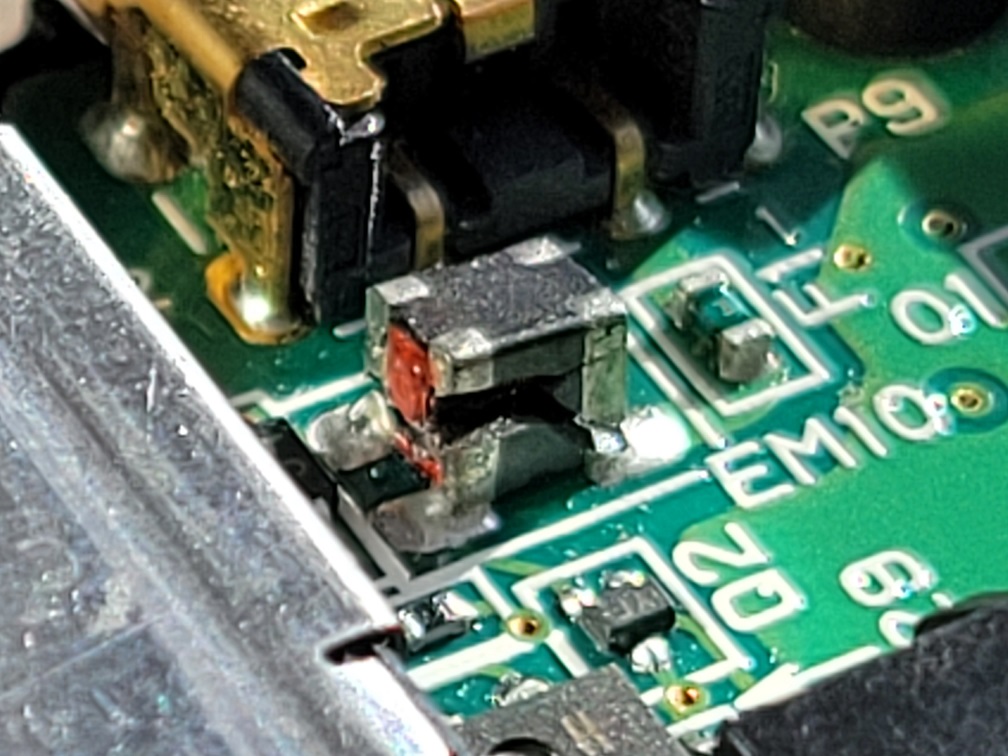
To fix this without any other parts, you’ll need a soldering iron for this. First, break of the cracked piece, using tweezers if needed.

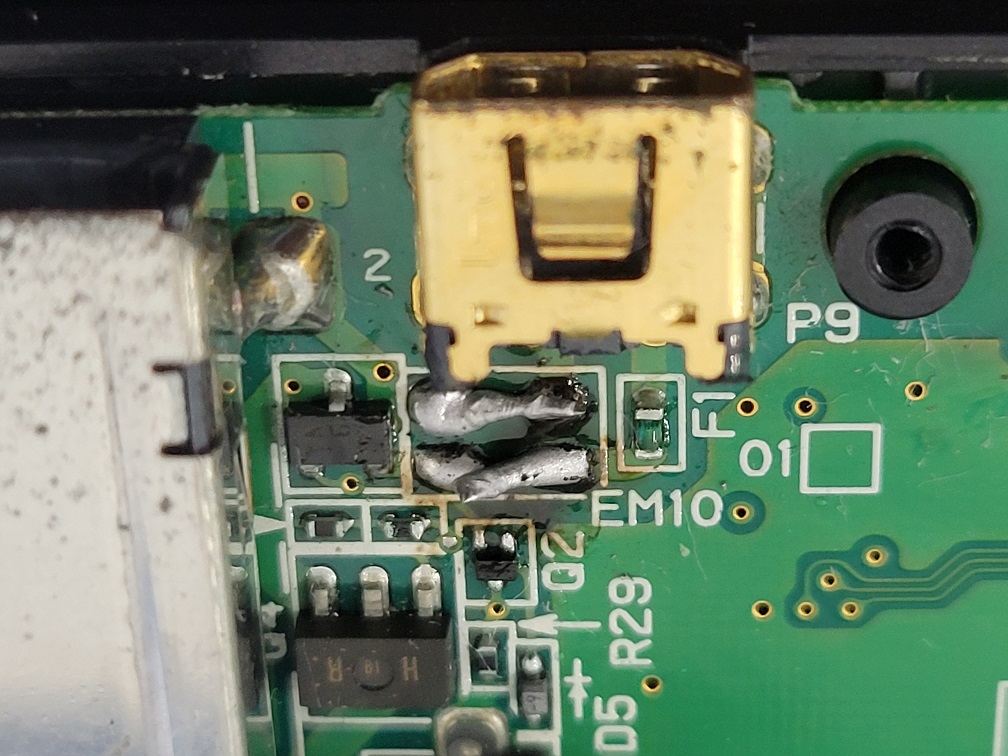
Use a bit of soldering wire to bridge the contacts from left to right like the image below.
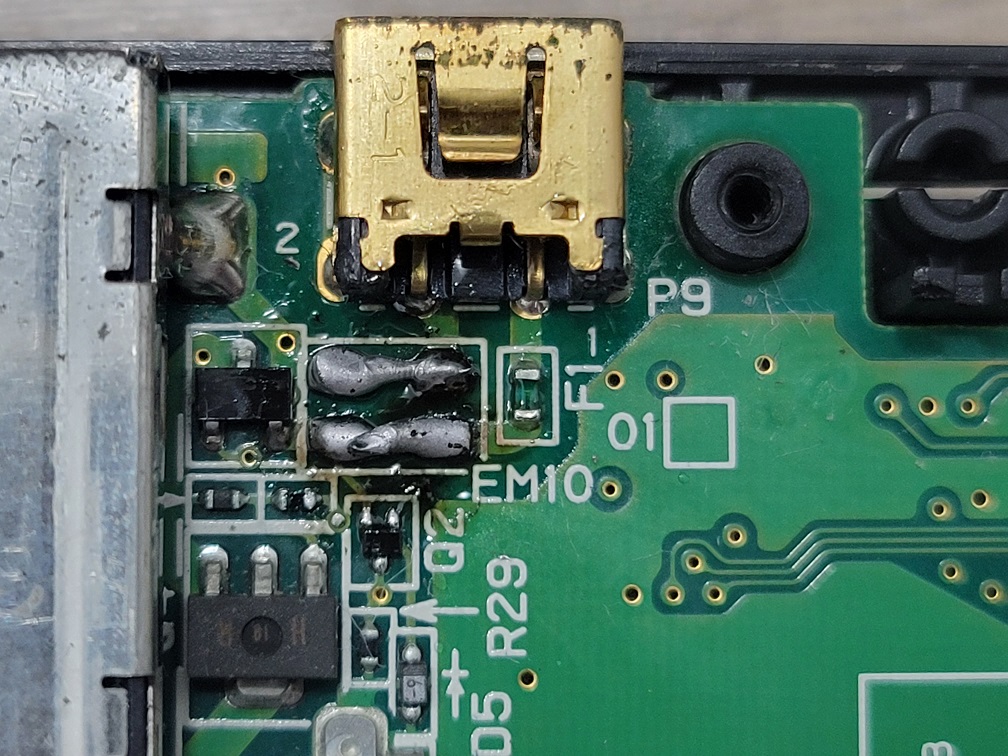
Here’s another angle of what the soldering should look like:
Now, plug in the charger to make sure the orange light shows up.